
Finger paint Fishing Birthday or fathers day card!
You will need
1 piece of blue card
1 piece of paper
1 piece of grey (or white) card
Scissors
double sided tape
Blue paint (we added white dots to add to the effect)
3 paint colours of your choice
googly eyes
String

fold your piece of blue card in half to make the base of your card. fold the blue piece the same way but then cut along the middle line so that you have an A2 sized piece. cut the paper horizontally about 3/4 of the way down. stick the larger piece down touching the bottom line of the card, making sure you only stick the sides and bottom line, leaving the top line unstuck like a pocket. stick the smaller piece on, again touching the bottom and leaving the top line free. it should look like this..

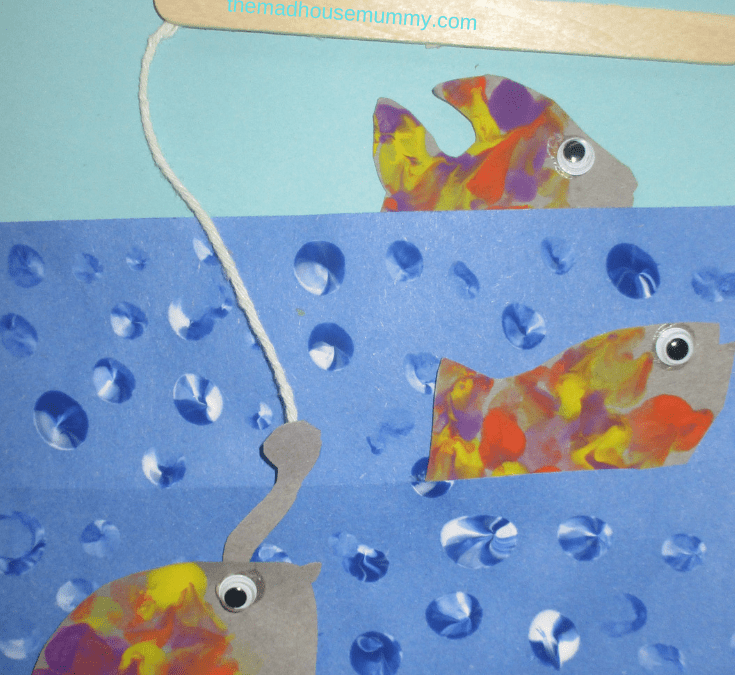
Cut out some fish shapes from your grey or white card. use the coloured paints to finger paint scales on to the fish. Stick on your gooogly eyes. next use the blue paint to fingerprint water on the front of the blue pockets of your card. fred painted a cute little sunshine on to his card too! now leave your fish and card to dry!
Whilst you wait for your card to dry, you can make your fishing rod. Cut a small length of string and using double sided tape stick it to the back of your lollipop stick. next, using the remainder of your grey/white card, cut out a hook shape and attach it to the end of the string

stick some of your fish down poking out of the pockets, attach your rod and place a fish on the hook.

Add your own cute personalised message and you are finished!


