If you’ve followed the blog at all you’ll know that i absoloutely love making keepsakes. They’re a beautiful way of looking back at previous stages of life and they really show how much our children have grown and developed over the years. We’ve made a couple of these cute little hand print bowls for my son to give to some special people for valentines day (including myself!). I think they’re absoloutely gorgeous. These bowls will definitely require a grown ups help as you’ll need to use a knife, but they really are quite simple and so much fun for kids to paint!
You will need
Air drying clay (alternatively you could use salt dough and bake them) Red and white paint Knife Paintbrush Q-Tip
Take two equal sized lumps of clay and roll them into two equal balls, Roll them out into flat disks. Next you will need to cut out your two hand prints. The easiest way we have found to do this is to draw around my sons hands on a piece of paper, cut out the hand prints and use them as a stencil to cut around with a butter knife.
Now mould your hand prints into a bowl by overlapping them at the palms and then pulling the fingers round to overlap. You can use a bit of water to act like glue if your clay isn’t securing together easily. Bend the outer edge of your bowl upwards. You may need to rest it upgainst something to keep the edges turned up whilst drying. put your bowl aside and leave it to dry for 1-2 days until solid.
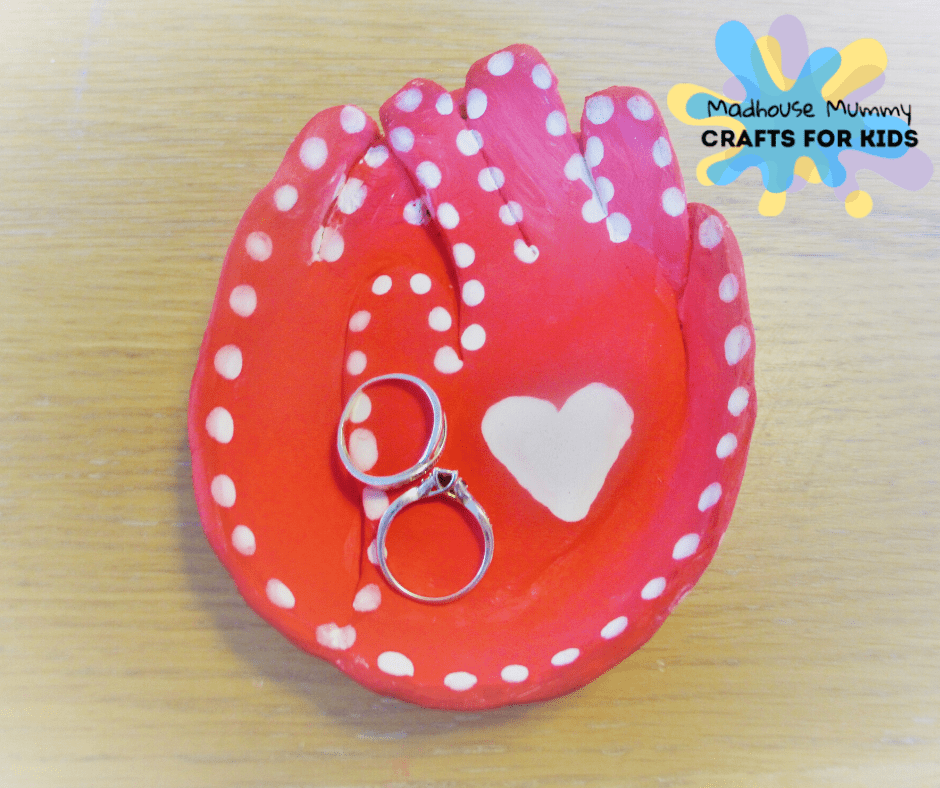
Once dry, coat your entire bowl in red paint.
Now all thats left to do is add the final decorations to your bowl. We dipped a q-tip into white paint to make the spots and heart. Leave to dry and you’re finished! Such a gorgeous keepsake to display and treasure or gift to a loved one!
Today we’ve been busy with yet more card crafts. This cute Pizza heart card is one my son wanted to make for his dad and we even used his favourite pizza toppings too! My little guy had a lot of fun making this card. it’s perfect for large groups to make for loved ones too, just stick the base pieces and toppings in the middle of the table!
You will need
Coloured paper Scissors Glue A marker pen
How to make a Pizza Valentines card!
First you will need to take the colour paper that you are using for your pizza base. Cut out a large heart and glue it near the top of your folded card.
Cut out a slightly smaller red heart and glue it down on top of your first heart to make your tomato base.
Now you will need to cut out your pizza toppings! My son wanted to make his dad’s favourite pizza, so we cut out some yellow strips for cheese, some grey mushrooms and some pink heart shaped ham pieces.
Glue your toppings down onto your pizza. We did the cheese on the bottom and then the other toppings on top.
Add your favourite pizza pun and your card is finished! All you have to do now is write your special message inside.
Valentines day is the time of the year where we show those closest to us how much we love and appreciate them. For me, I think its a great holiday for children. It teaches the importance of expression and appreciation of those who deserve it. Personally I don’t think there is any better valentines gift than a handmade card; it doesn’t cost much to make and the effort that goes in to it means more than anything you can buy. This heart jar valentines is so sweet and easy to make. its great for older children to practise using scissors and as a sticking activity for smaller children.
You will need
Coloured card Coloured paper Glue Scissors Markers
To start, take your piece of card and fold it in half. Cut the shoulders of your jar in to the top of your card.
Take the paper you are going to use for the lid and cut out two equal rectangles. Glue the first to the front of your card. Now, flip your card over and line the second one up on the back. This will help weigh it out so that your card can stand easily.
Now for the fun bit! Cut out several coloured hearts and stick them down all over your jar.
To finish of your card simply add your own super cute message to the lid. All that’s left to do now is to write inside and give your card to someone special!
This Little lovebug heart card makes the perfect card for valentines day or for any loved one! They’re super simple to make and only require basic craft materials, which makes it a great craft for classes and groups.
You will need:
Red card Black card Glue Scissors Googly eyes Black pen
From one piece of card you can make 3 love bug cards. Fold the card into 3 and cut along the folded lines.
Take one of your rectangle sections and fold it in half. Next you need to make your heart shape. To ensure the card functions, be careful not to cut the folded side of the card. Instead, use the folded side to make one side of your heart.
Next you need to make the head shape of your love bug. We found the easiest way to do this was to draw around the point of our bug then freehand draw the curve. Cut it out and glue it on to your bug.
Now you need to cut out and glue down hearts to decorate your card.
To finish the front of your little lovebug heart card, add two googly eyes, cut out a mouth shape and use your marker to draw on the shape of your wings!